Super Gooey Chocolate Coma Brownies

ImageI will be the first to admit that I fail a LOT when it comes to grain free / sugar free baking. My family will also vouch for the fact that it makes me very upset when I do. I know, “don’t sweat the small stuff!” But for me, baking is more than just a hobby, it’s something I really love, and am usually pretty good at. Although there are lots of treats I can whip up on a whim, my baking often involves quite a bit of time recipe searching, researching diet-specific substitutions, creating, and waiting (impatiently!) for it to come out of the oven, as well include many nutrient dense ingredients that are not cheap! Not to mention, I hate wasting food, so I usually end up forcing my less fortunate baked goods upon my family (though they seldom argue), or eating them myself… leaving me still with an unsatisfied craving. Lately, I’ve had a doozy of less than fantastic creations. I mean, they’re usually good, but I’m picky. I like my healthy treats to taste unhealthy. Clean eating with a dirty mind! Out of frustration, I had decided to take a break from baking. I know, tragic. But then, I wanted chocolate, and pinterest was taunting me with pictures of delectable looking chocolatey treats! So I caved. And a miracle happened. An insanely delicious, “fool any non-paleo, gluten eating being”, fabulous kind of miracle. In brownie form.
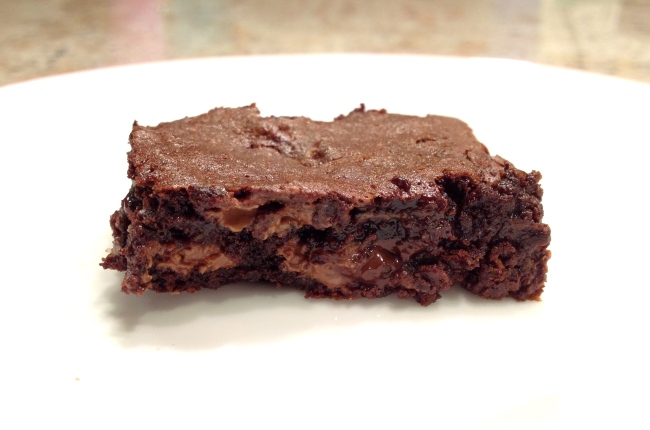
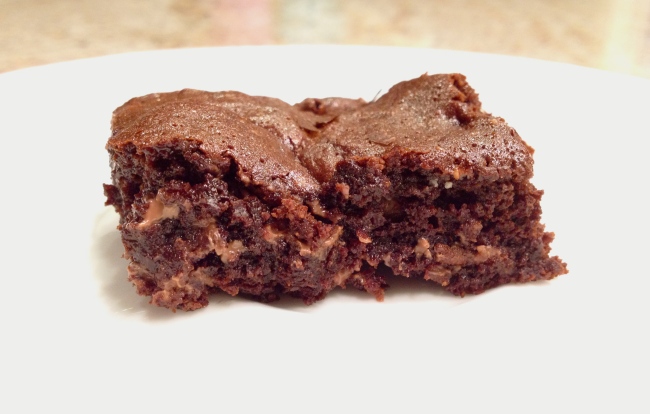
Image^^^ The extra gooey one I cut right from the middle of the pan. Guilty.

I decided I wanted Betty Crocker brownies. (I mention Betty a lot, we were close back in the day.) Straight from the box.. but without the sugar, corn syrup, flour, and hydrogenated oils. I have an amazing brownie recipe that I love already, but it’s just not quite fudgy enough, and is a little heavy on the coconut flavour for what I was going for here. I wanted gooey, soft, fudgy, put-you-in-a-chocolate-coma type brownies. And that’s what I got!! Adapted from Recreating Happiness’ recipe for “The Perfect Fudge Brownies,” these are THE REAL DEAL. I mean, the name says it all. They taste like they came from a boxed mix! In the best way! My mom, who is not paleo, even agreed; she loved these, and she’s picky about her chocolate! Oh, and they’re also gluten free, grain free, and other than dark chocolate, contain only natural sweeteners. Hello! Win. Win. Win.

Tastebuds dancing. Tummy smiling. Chocolate coma induced. Success all around! =)

Super Gooey Chocolate Coma Brownies
Gluten Free, Grain Free, Naturally Sweetened

Ingredients:
2/3 cup almond flour
1/4 tsp baking soda
2 oz. unsweetened chocolate
1 cup dark chocolate chips
3 tbsp. butter
1/2 cup coconut palm sugar
2 tbsp honey
2 eggs
1/2 tsp. vanilla
Additional chocolate chips

Directions
Preheat oven to 325°F.
1. Melt unsweetened and dark chocolate with butter in a double boiler. Once melted, remove from heat and allow to cool for a few minutes.
2. Pour the chocolate into a mixing bowl, and beat in the coconut sugar and honey until smooth.
3. Add eggs, and beat on low/medium for at least 30 seconds. This helps create a nice shiny crust on the top of the brownies!
4. Stir in vanilla, then stir in almond flour and baking soda together.
5. Stir in additional chocolate chips. I used lots of dark and milk (paleo fail-eo!) Callebaut chocolate!!
6. Pour batter into a parchment lined or greased 9 x 9 pan.
7. Bake for ~25 minutes, give or take, your knife should come out clean (unless you hit a chocolate chip!), but they should still be ooey gooey on the inside!
8. Eat them hot and fresh out of the pan! Trust me on this one!

“Believe It Or Not” Healthy Double Chocolate Cookies

ImageOh you better believe it.

So I’ve had this mad craving for a Betty Crocker chocolate brownie. You know, those ones that you make from the boxed mix, and are untouchable, even by the homemade variety?! Yeah, those. Well I refused to succumb to those sinful sugar bombs.. so instead I made these babies.. then ate 3.

Sometimes I think I should just eat the damn brownie.

But then! I remember that these particular cookies are made with healthy ingredients! With actual nutritional value! Instead of corn syrup, these are sweetened with pureed raisins or dates, which boast an impressive nutritional profile in comparison to other sweeteners. Instead of wheat flour, these are made with ground almonds, which contain healthy fats, fibre, and protein. Instead of partially hydrogenated soybean and/or cottonseed oil (eek!), these are made with avocado, which is another amazing source of healthy fats, fibre, and potassium! Combine these nutrient dense ingredients with organic cacao powder, and high quality dark chocolate (we’ve gotta give a little!), and you have some INSANELY delicious, and HEALTHY cookies! Yes, these are considered straight up health food in my eyes. It helps me justify eating several at once. =)

ImageOh, and did I mention that they taste amazing too? The cookie by itself is not overwhelmingly sweet, but has a rich, decadent flavour, and unbelievably fudgy texture. The addition of the dark chocolate chips lends just the right amount of sweetness, and adds ooey gooey, melty goodness to every bite. Basically, these are a delectable, fudgy brownie, in a convenient cookie form. Craving crushed.

Make them now. Thank me later.

“Believe it or Not” Healthy Double Chocolate Cookies
Gluten free, grain free, sugar free, and dairy free (if made with dairy free chocolate chips)

Ingredients:
1 ½ cups almond meal (I grind my own in my Magic bullet)
1 cup cacao or cocoa powder
1½ teaspoon baking soda
1 ripe avocado
1 cup dates or raisins, pureed
1 large egg
1 teaspoon vanilla extract
As many dark chocolate chips as you can possibly cram in there!

Directions
Preheat oven to 350°F.
1. In a large bowl, mix together almond meal, cocoa powder, and baking soda.
2. Using a food processor or good quality blender, puree raisins or dates first, then blend in avocado, vanilla, and egg until smooth.
3. Combine wet ingredients into dry mixture. Mix until incorporated.
4. Add dark chocolate chips and stir until evenly distributed.
5. Bake on a parchment lined baking sheet for 9 minutes.
6. Eat one fresh out of the oven. Store remaining cookies in sealed container in the fridge or freezer.

*Note: These taste awesome both warm, or frozen. Yum!!

Recipe credit to my beautiful baby sister Kelynn!!

Gluten Free Oatmeal Caramel White Chocolate Chip Squares

IMG_4484

Before our gluten and sugar free days, one of my sister and I’s favourite treats were Oatmeal Caramel White Chocolate Chip Squares. Filled with brown sugar, caramel ice cream topping, and white chocolate confectionery, they were definitely an ultra-sweet treat, but the furthest thing from healthy. Well the other day, I decided I wanted them. However, there was NO way I was going to put all of that processed sugar into my little body! So I practically emptied my pantry onto my kitchen counter, and got to work!  =)

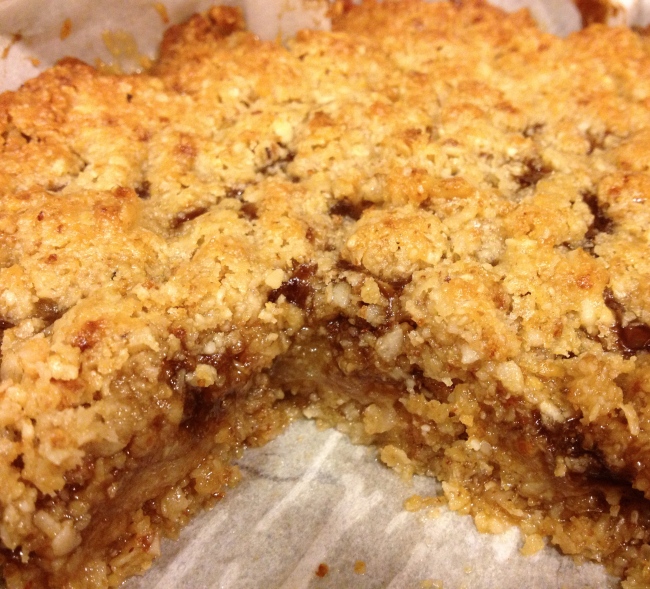
Image

The result? A soft and crumbly, cookie-like crust, sweet smooth caramel, and velvety white chocolate. All combined to create this decadently gooey dessert that will make you want to eat another.. and another!! And let me tell you.. I will always make homemade white chocolate from now on!! I have never been a huge fan of how sicky sweet store-bought white chocolate is. In my opinion, it just doesn’t belong in the chocolate family! However, this homemade version is dairy free, refined sugar free, and is made with organic cocoa butter, which lends a creamy and real chocolatey taste! That’s right, white chocolate that actually tastes like chocolate! Just thinking about it makes me want to whip up another batch, so on that note..

Oatmeal Caramel White Chocolate Chip Squares
Gluten Free, Refined Sugar Free, Egg Free

Ingredients:
White Chocolate:
1/3 cup creamed honey
1/3 cup melted cocoa butter
1/2 tsp vanilla
2 tbsp coconut flour

Caramel:
2 tbsp water
1/4 cup coconut palm sugar
1 tsp vanilla
3/4 cup coconut milk
1 tbsp butter

Oatmeal Crust:
1 cup almond flour
1/2 cup coconut flour
1 3/4 cup oats
1/4 cup coconut palm sugar
1/8 cup Steviva Blend (or an additional 1/4 cup coconut palm sugar)
3/4 cup butter

Directions
White Chocolate:
1. Melt the cocoa butter in a pot on medium low heat, then pour it into a bowl.
2. Add the honey (I used creamed, but liquid might work) and vanilla, and whisk it! Lots!! It doesn’t want to combine but it will!
3. Whisk in 2 tbsp coconut flour.. don’t worry, it doesn’t make it have too much of a coconut-y flavour, and it’s necessary for binding!!
4. Place in freezer until set.

Caramel:
1. Place water and coconut palm sugar in a pot, and bring to a boil, stirring constantly so it doesn’t burn.
2. Add coconut milk and vanilla, and let it boil on medium heat for about 10-15 minutes, stirring constantly as well. The mixture will slowly begin to thicken into a dark caramel!
3. Once thickened, remove from heat, and stir in butter.
4. Allow it to sit and cool.

Oatmeal Squares:
Preheat oven to 350°F.
1. Cream butter and sugars.
2. Add almond flour, coconut flour, and oats, and mix well.
3. Pat half the batter into an 8 inch parchment lined or ungreased pan, and bake for 10 minutes.
4. Remove from oven and allow to cool for 5-10 minutes.
5. Cut the white chocolate into little chunks, and spread over the crust, then pour and spread the caramel over the chocolate. Crumble the remaining oatmeal batter on top.
6. Bake for 20 minutes, or until edges and crumble on top are starting to become golden.
7. Enjoy this unbelievable yummy treat!!

*Note: If you choose to use homemade white chocolate, it will melt inside the squares, and will kind of meld together with the caramel. But don’t worry. The taste is still very much there, and it’s freaking awesome!

Paleo Double Chocolate Cupcakes

ImageLet’s talk about cake. I’ve never been a fan of chocolate cake. I know, who am I?! It just doesn’t do it for me. Chocolate? Yes please. Brownies? Heck yes. Chocolate cake? Meh. But these cupcakes have converted me! The best part? They’re grain free, naturally sweetened, and full of good, healthy fats! Plus chocolate! Winning combo in my opinion!

Paleo Double Chocolate Cupcakes
(Adapted from Living Healthy With Chocolate’s Coconut Cupcakes)
Grain Free, Gluten Free, Sugar Free, Dairy Free

Ingredients:
1 1/2 cups almond flour
1/2 cup coconut flour (I ground my own.. if you use store bought, you will need closer to 1/4 cup)
1/2 tsp. baking soda
6 tbsp. cacao powder or cocoa powder
1 cup full fat coconut milk
1/4 cup coconut oil
1/4 cup honey
1/4 cup coconut butter
2 eggs
2 tsp. vanilla
Chocolate chips (optional)

Ganache:
Dark chocolate chips
2 tsp. full fat coconut milk

Directions
Preheat oven to 350°F.
1. In a large bowl, mix together dry ingredients.
2. Combine wet ingredients, then add the dry mixture, and mix until incorporated.
3. Add chocolate chips if desired! (I know you do!)
4. Spoon batter into lined muffin tins, to about 2/3 full.
5. Bake for 20 minutes, until toothpick comes out clean.
6. For ganache, melt dark chocolate and slowly add coconut milk, being careful not to seize the chocolate.
7. Spread ganache over cooled cupcakes, and enjoy!

Mango Macadamia Nut Larabars

ImageI’m the type of person who has to bake on an empty stomach. This is because I usually don’t use a recipe, and if I do, I’m modifying it a whole bunch to suit my dietary needs. So it’s a lot of trial and error.. and by trial and error, I mean it’s a whole lot of tasting on my part! Which really isn’t alllll that bad… =) … but it makes it difficult to duplicate the recipe later, especially when I just go at it and don’t write anything down! Homemade Larabars have always been one of these ‘taste as you go’ projects; it’s all about the texture, and ratio of sweetness to nuttiness. However, after having lots of recipe requests for these delectable little snacks, I’ve decided to start paying attention to how I make them!! Yay! This variation is a flavour combination I just knew would taste amazing! Mango, macadamia nuts, coconut.. it’s tropical bliss is a convenient little square! The great thing about Larabars is they really don’t need a precise recipe, so you can follow mine exactly, or add and remove as you please. Play around! Everyone says baking is a science, and to an extent it is, but when it comes to raw treats, you have so much more freedom to experiment and tweak the recipe to your liking. Sometimes it works, sometimes it doesn’t, but hey, that’s why I do most of the experimenting for you! =)

Mango Macadamia Nut Larabars
Grain Free, Gluten Free, Refined Sugar Free, Vegan, Raw

Ingredients:
1/2 cup pitted dates
1/2 cup unsweetened dried mango
1/4 cup to 1/2 cup hot water
1 cup macadamia nuts, ground into a flour
1/2 cup unsweetened coconut

Directions
1. Puree dates and mango in a food processor, adding hot water until it creates a thick, but smooth paste. (I needed the entire half cup, as my mangoes were very thin and dry, but you may not need as much!)
2. Add the macadamia nut flour, and food process until incorporated.
3. Add coconut, and pulse until incorporated to your liking. (I like mine to have bigger shreds of coconut, so I blend it less!)
4. Press mixture into a parchment lined container, and freeze until set.
5. Eat them up!! Store what’s left (if there is any!) in the fridge or freezer.

Paleo Crackers

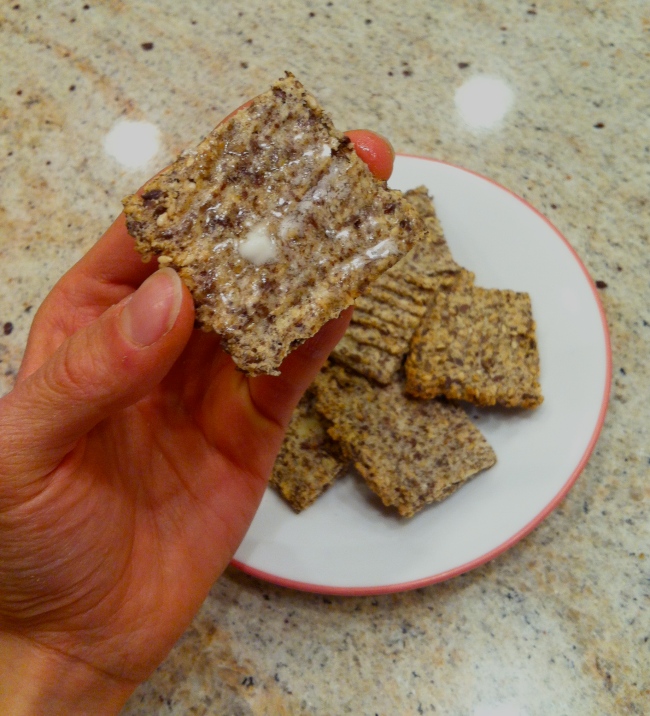
Image

The other night, I was craving that crunchy, saltiness that you can really only get from a good, crispy cracker. So I did a little late night recipe experimentation, and BAM! Paleo crackers were born! These little squares of goodness pack just the right amount of savoury, crunchy flavour, and are delicious on their own, smeared with butter, or sandwiched with cheese! Craving satisfied!

Paleo Crackers
Grain Free, Gluten Free, Sugar Free, Dairy Free

Ingredients:
Yields 9-12 crackers
1/4 cup almond flour
1/8 cup arrowroot flour
1/8 cup ground flaxseed
1 tbsp. whole flaxseeds
1 tbsp. sesame seeds
1/8 cup egg whites
Salt

Directions
Preheat oven to 350°F.
1. Combine all ingredients and mix well.
2. Spread onto a parchment lined baking sheet, about 1/8 inch thick.
3. Bake for 13 minutes, then cut into squares and bake for about 5 more minutes, until edges are slightly crisp.
4. Add more salt to top of crackers if desired.
5. Eat warm with butter, or allow them to cool for ultimate crispiness!

Image

Gluten Free Crisp… of the fruit variety!

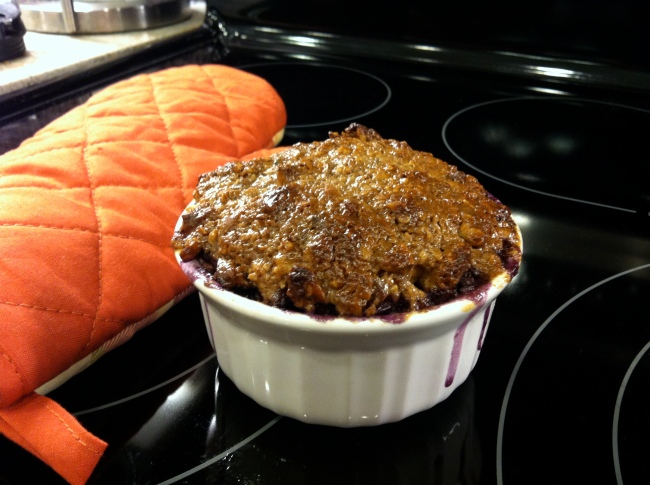
Image

My grandma’s apple crisp has always been my favourite dessert. For every holiday and family dinner, I would ask her to make it, and she happily obliged. When I found out she didn’t use a recipe, I went over to her house one day to make it with her, carefully taking note of each ingredient and measurement so that, with luck, I could duplicate it myself – and that I did! This dessert became my go-to, and was always RAVED about…. but then I went gluten and sugar free. Now how the heck was I supposed to replicate the BEST DESSERT EVER without pillowy flour and sweet brown sugar?! Well I can’t say my new version is as amazing as my Grandma’s, but I can say that it comes pretty darn close!! Using gluten free oats and nut flours, I’ve been able to mimic that crumbly, almost cookie like texture of the crisp, while a mix of coconut palm sugar and honey gives it that light sweetness, reminiscent of brown sugar. Baked over top of warm, soft fruit, and spiced with cinnamon… this makes for the perfect fall dish!! Plus for me, this new recipe means no stomach ache afterwards! Serve warm with coconut milk ice cream, on it’s own.. or eat it cold for breakfast the next day. Either way, this treat is the ultimate in (almost) guilt free comfort food! =)

Gluten Free Apple Crisp
Gluten Free, Refined Sugar Free

Ingredients:
3 apples (Or any variety of fruit! The picture above is a mix of blueberries and apples!)
1/4 cup almond flour
1/4 cup pecan flour
1/2 cup oats
1/2 cup coconut palm sugar
1/2 cup slightly softened butter
2 tbsp. honey
1 tsp. cinnamon + more for apples

Directions
Preheat oven to 350°F.
1. Peel, and chop apples into small pieces. Sprinkle and toss the apples (and/or other fruit) with cinnamon.
2. Place fruit into a 7×5, or any small, casserole dish. You may need more or less fruit, just fill the dish!
3. Combine all other ingredients, mixing with a fork into a soft crumble.
4. Pat crumble mixture overtop of the apples.
5. Bake for approximately 40 minutes, until golden brown, however this could be anywhere from 30 minutes to an hour!
6. Share with friends, family, and enjoy!

Paleo Banana Coconut Cream Pie

Image

This pie. It’s banana-y, it’s coconut-y, it’s creamy, it’s heaven. It will fool any paleo-hater out there!! Sometimes I nix the crust and eat the filling on it’s own for a yummy custard treat! Either way, it’s freaking delicious!

Paleo Banana Coconut Cream Pie
Grain Free, Gluten Free, Sugar Free, Dairy Free

Ingredients:


Crust:
2 cups almond flour
3/4 cup coconut flour
3 tbsp melted butter

Custard Filling:
2 ripe bananas
1 can full fat coconut milk
1/3 cup honey
3 egg yolks
1/8 cup + 1 tbsp arrowroot flour
1 tbsp coconut butter (or butter if you’re okay with dairy)
1 tsp vanilla
1/2 cup toasted coconut + more for topping if desired

Directions
Preheat oven to 350°F.
1. Mix melted butter into coconut and almond flours, and pat into a pie pan.
2. Bake for 10 minutes.
3. Toast 1/2 cup coconut in the oven for around 5 minutes, until nice and golden brown. This may takes longer, or may be quicker, so make sure to watch it! You may need to stir it around once or twice as well.
4. Now for the custard! In a pot on medium high heat, bring coconut milk and honey to a simmer.
5. Whisk egg yolks in a small bowl, and slowly add about 3/4 cup of the hot milk mixture to temper. Then add it back into the pot.
6. Dissolve the arrowroot powder with some hot milk to make a thin paste, then add it back to the pot as well.
7. Bring mixture to a boil, then allow it to simmer for 4-6 minutes, until thick.
8. Remove from heat, and add coconut butter, vanilla and 1/2 cup toasted coconut.
9. Line the crust with thinly sliced banana, then pour the custard over top. Top with coconut, and fresh bananas, refrigerate, and serve!

*Note: You can use any nuts you would like for the crust! I sometimes use walnut flour as well (I grind all my own nut flours in my Magic Bullet), and experiment with different proportions. You may need a little bit more or less butter for the crust, you want the nuts to stick together just enough to be able to pat them into the pan! Play around with it!